Affinity Publisher combines the raster editing power of Affinity Photo and the vector precision of Affinity Designer into a single versatile tool.
In this tutorial, we’ll explore how to create bold and chaotic acid graphics, blending vectors, vibrant colors, and experimental-looking raster effects. With its seamless workflow, Affinity Publisher makes it easy to push creative boundaries.
Let’s get started!
1. What you’ll need
To create striking acid graphics, start by collecting a range of assets from Envato that align with the aesthetic you’re aiming for.
Look for vector graphics inspired by the 80s and 90s, such as retro-futuristic patterns, neon color schemes, and grids reminiscent of early computer rendering. Wireframe 3D elements can add depth and dimension, while visuals influenced by cyberpunk classics like Ghost in the Shell and Johnny Mnemonic bring a gritty, tech-driven edge.
Don’t hesitate to mix and match styles, and don’t limit yourself to assets that are compatible with Affinity Publisher. You can open Adobe AI, SVG, EPS, and PDF files. I’ve put together a collection of assets you can use for this tutorial.
2. How to create the layout in Affinity Publisher
Step 1
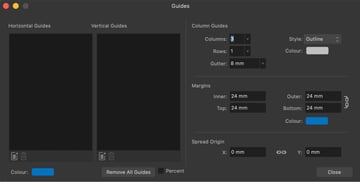
Set up your document and create a 3-column grid with guides. Start by setting up your document in Affinity Publisher. I’m designing an A3 poster, but you can use any size you like. Once the document is created, go to View > Guides and add a 3-column grid.

Step 2
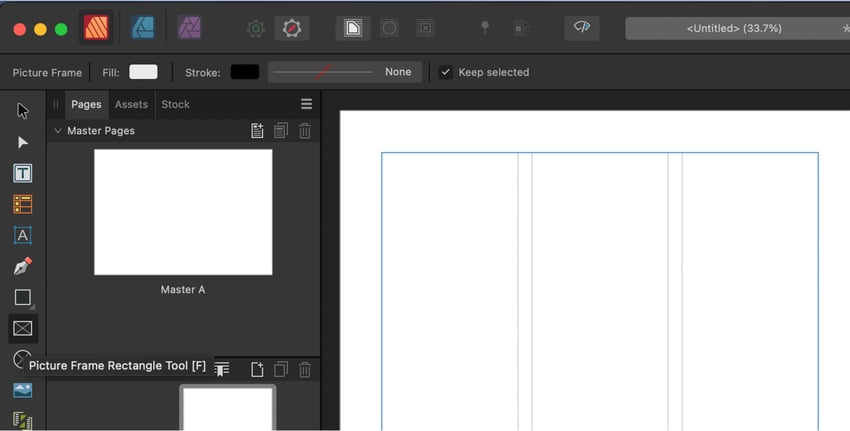
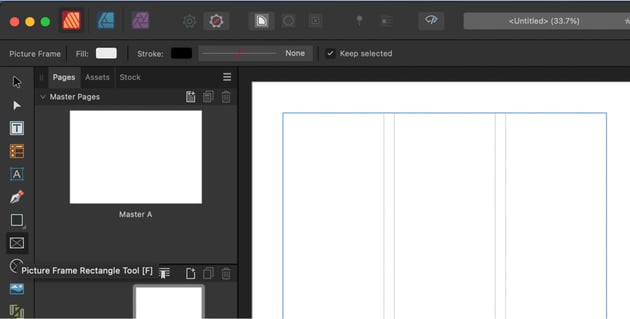
Block out shapes for clipping images. Use the Picture Frame Tool in the toolbar on the left to block out placeholders for the images you’ll be using. These will form the foundation of your layout, and you’ll clip images into these frames later.
Step 3
Switch to Affinity Designer Persona. Click on Affinity Designer Persona in the toolbar to access advanced vector editing tools. This step allows you to build and customize intricate geometric shapes that will elevate your design.
Step 4
Create a rectangle with beveled edges. Draw a rectangle and add beveled edges, and then adjust its corner properties in the toolbar. We’ll use this to cut geometric shapes into the picture frames. You can also bevel the corners of the picture frames if needed.
Step 5
Hold Alt (Option) and click and drag to duplicate the rectangles and place each of the rectangles near the edge of a picture frame. We’ll combine the rectangles and picture frames in the next step to create geometric shapes that add to or cut out bevels in the picture frames.
Duplicate the rectangle as needed, and place the duplicates over the edges of the picture frames.
Step 6
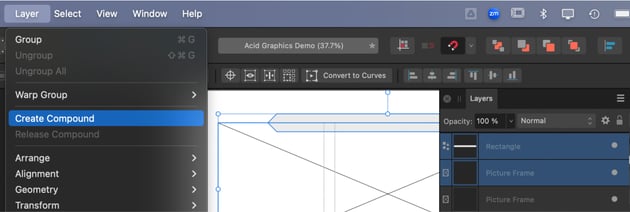
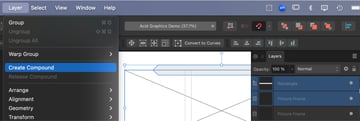
For each picture frame, create a compound shape with the overlapping rectangles. Select the picture frame and, while holding Shift, select each of the rectangles overlapping its edges. Then go to Layer > Create Compound. This is different from using the boolean operations on the command bar at the top in that it creates a live compound that you can continue to edit.
In the Layers panel, you’ll see the rectangles and picture frames grouped under the Compound layer.

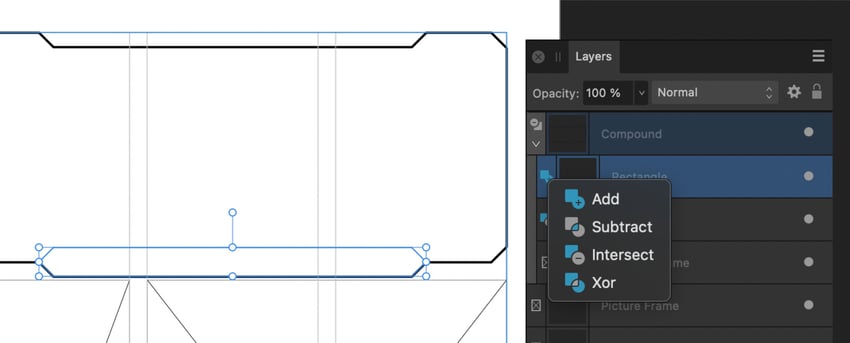
Step 7
Set the boolean operation for each of the rectangles. In the Layers panel, on the left side of each of the layers contained within the compound shape, there’s a button for the boolean operation that they perform.
For some, we can set them to Subtract to carve a geometric shape out of the frame. Others can be set to Add so they add a geometric shape to the frame.
In every case, our rectangles should be above the picture frame in the compound groups.


Step 8
You will need to flatten the shapes in order to use them as clipping masks for content. This is a destructive step, so it’s good to make a backup of the work you’ve done so far.
Group the compound shapes and duplicate the group in case you want to edit them later.
Once you have a backup, you can hide it by clicking the light grey circle on the right side of the layer in the Layers panel.
For each compound shape, one at a time, go to Layer > Convert to curves. This will turn them into flattened vector shapes that we can clip images to.
3. How to create the acid raster effect
If you used one of the images from the linked collection, they should work well since the background is mostly red and you can get good separation between the subject and background with only the adjustment layers.
Step 1
Import your image into the document with File > Place and place it above the shape we just converted to curves. Clip the image to the shape by dragging it onto the shape layer in the Layers panel.
Step 2
Switch to the Photo Persona in the command bar (the purple icon) to access powerful image-editing tools. This persona gives us access to all of the adjustment layers, masking tools, and pretty much anything else we might need from the mini persona of Affinity Photo.
Step 3
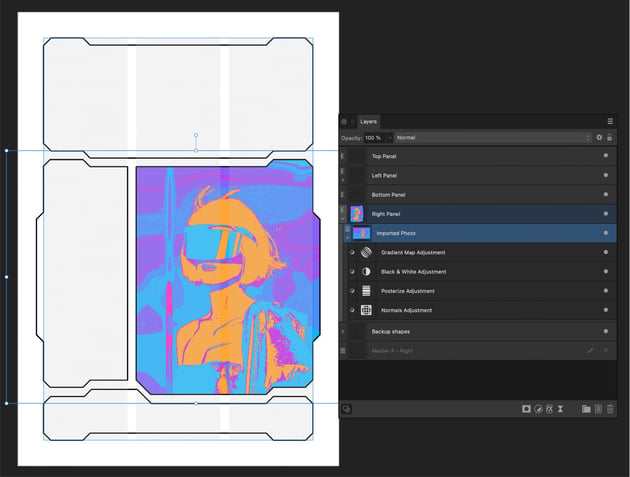
Click on the image layer in the Layers panel to activate it. Ensure the image itself is selected so that the adjustments will apply to it. As you create adjustments, they may appear higher in the layer stack.
We can always drag the adjustment layers in the Layers panel as needed, and it is important that the adjustment layers should only apply to the image you just imported, not the whole design.
Step 4
Using the adjustment layer button on the bottom of the Layers panel, add the following adjustments in order. Drag each one into the layer stack so they are attached to the image layer in order, with the first adjustment at the bottom and the last at the top.
- First, apply Normals to make the background more abstract and amplify the surreal feel of your acid visuals.
- Then, apply Posterize and fine-tune the number of levels to give the image a gritty, graphic edge.
- Next, add a Black and White adjustment to control where the colors in the final adjustment will be applied.
- Finally, apply a Gradient Map to replace tonal values with bold colors. For acid graphics, use vivid combinations in an analogous order, like cyan, blue, magenta, and orange, to achieve a striking, high-energy result without mixing complementary colors in the middle and having them cancel out.


4. How to add the vector assets
Step 1
When it comes to vector files, you have a number of options to bring them in. You can, of course, import individual SVG and EPS files. But we’ll take advantage of the fact that Affinity Publisher can open Adobe Illustrator files. To do this, simply go to File > Open in Affinity Publisher and navigate to the Adobe Illustrator file you want to open. Then click Open.
Step 2
Some of the linked 3D vector files require that you download and install fonts or replace them with fonts you already have installed.
If you don’t want to download or replace fonts, you might try opening a flattened Adobe PDF file or a flattened Adobe Illustrator file, if one was provided, or using the SVG files. It can also be helpful to group vector graphics that you want to use before bringing them into your main file.


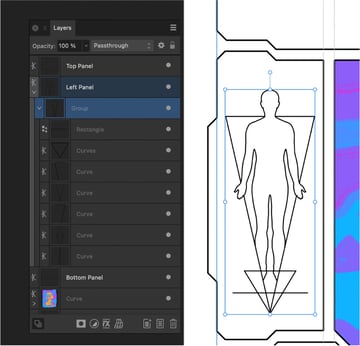
Step 3
Placing the 3D wireframe and mesh grid vector graphics is as simple as copying from one document and pasting them in your design. For each asset you want to bring in, copy it in the source file and then paste it into the poster file.
Clip it to the layout shape where you want it to appear by dragging it onto that layer in the layer stack, and then adjust the colors and the shape fill. Continue pasting in vector files as needed!
And that’s it! Your acid graphics are ready!
By combining the power of Affinity Publisher, Affinity Designer, and Affinity Photo, you’ve unlocked the full potential of creating bold and experimental acid graphics. From building intricate geometric shapes to adding vibrant raster effects and integrating vector assets, this tutorial demonstrates how seamlessly these tools work together.
If you want some design inspiration for your next project, check out the best graphic design trends of 2025!