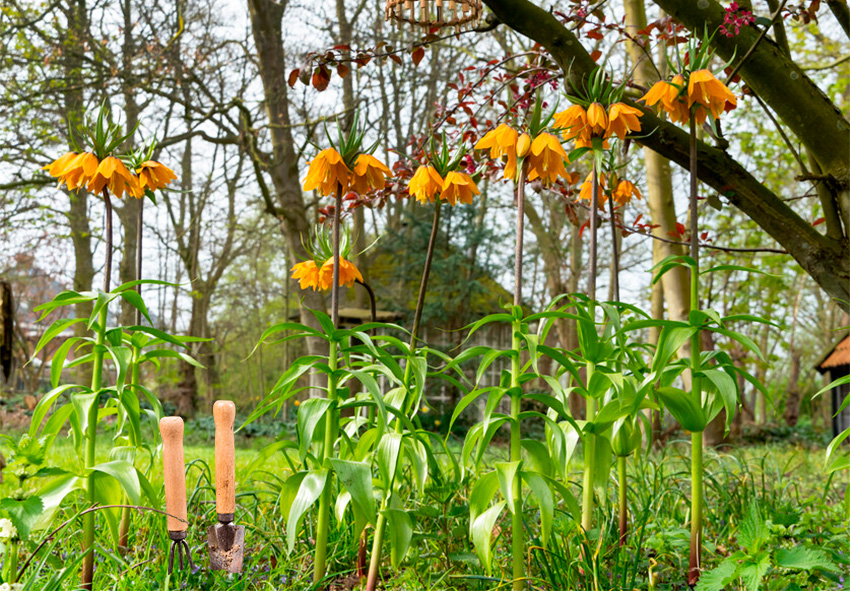
Fritillaria bulbs are an exceptional addition to any garden, known for their distinctive, bell-shaped flowers and striking appearance. These elegant blooms stand out in spring, making them a unique focal point in garden beds and borders. Fall is the ideal time to plant Fritillaria bulbs, giving them time to establish their roots before the colder months. In this guide, we’ll cover everything from selecting the right location and preparing the soil to step-by-step planting tips and caring for your bulbs throughout the seasons. Our gardening blog is a perfect place to find all the information you need!
Preparation for Planting Fritillaria Bulbs
Proper preparation is key to ensuring healthy growth and stunning blooms in the spring. Fritillaria bulbs need specific conditions to thrive, and understanding when and where to plant them is the first step toward success.
When to Plant Fritillaria Bulbs
Fall is the best time to plant Fritillaria bulbs, as it allows the bulbs to establish roots before winter sets in. Typically, you should aim to plant them between late September and November, depending on your climate. Be sure to plant before the first frost, as this gives the bulbs time to settle into the soil and prepare for dormancy.
Choosing the Right Location
Fritillaria species vary in their light requirements, but most prefer a sunny to partially shaded location. Choose a spot in your garden that receives morning sunlight and some afternoon shade. The soil is just as important as light; Fritillaria bulbs thrive in well-drained soil, which helps prevent rot. If your garden has heavy clay soil, consider amending it with organic matter, such as compost, to improve drainage.
Preparing the Bulbs
Before planting, you have to prepare your bulbs. Preparing your Fritillaria bulbs properly ensures they have the best chance of thriving and producing vibrant blooms:
- Inspect the Bulbs: Check each Fritillaria bulb for signs of damage, mold, or soft spots. Discard any that are unhealthy to prevent the spread of disease.
- Handle with Care: Fritillaria bulbs can be fragile, so avoid squeezing or dropping them. Use gentle handling when preparing them for planting.
- Soak the Bulbs: Before planting, soak the bulbs in water for a few hours. This helps hydrate them and encourages faster root development once planted.
- Apply Fungicide (Optional): In areas with wet winters, dust the bulbs with a fungicide to protect them from rotting. This is especially important in soils that retain moisture.
- Sort by Size: If you have bulbs of varying sizes, plant the larger ones deeper and give them more space. Smaller bulbs can be planted closer to the surface.
Step-by-Step Guide to Planting Fritillaria Bulbs

Planting Fritillaria bulbs is a straightforward process, but following the right steps ensures the best results. From soil preparation to proper planting techniques, this section will walk you through the process.
Preparing the Soil
Start by preparing the soil to ensure the best possible growing conditions for your bulbs. Mix in organic matter like compost or well-rotted manure to improve the texture and drainage of the soil. Fritillaria prefers neutral to slightly acidic soil with a pH of 6.0 to 7.0, so you may need to test your soil and adjust it accordingly.
Planting Depth and Spacing
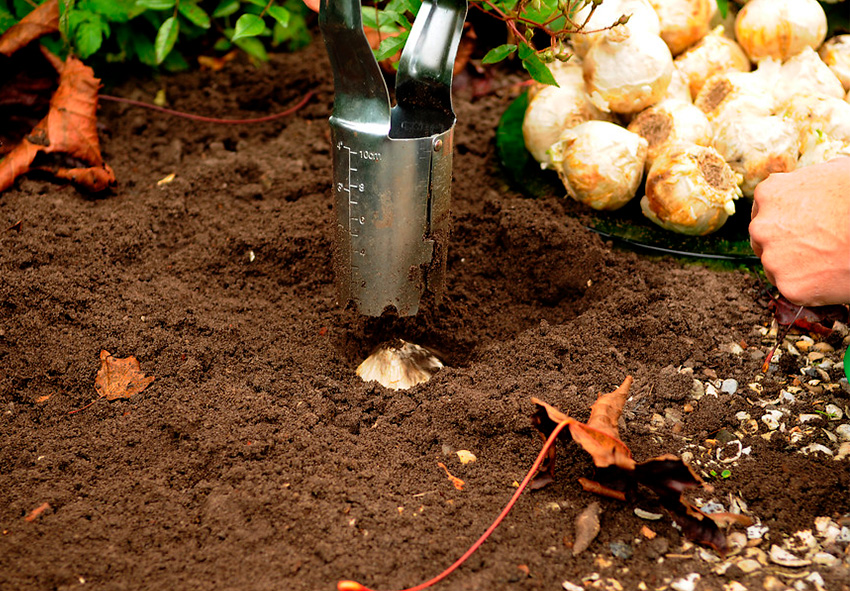
The planting depth and spacing are crucial for Fritillaria bulbs to grow healthily. Depending on the species, bulbs should be planted between 3 and 8 inches deep. Larger species like Fritillaria imperialis require a deeper planting depth, while smaller varieties can be planted more shallowly. Space the bulbs at least 8 inches apart to ensure they have room to grow without overcrowding, which can lead to disease.
How to Plant Fritillaria Bulbs
Once you’ve prepared the soil and determined the proper depth, you have to plant the bulbs following these recommendations:
- Dig the Planting Holes: For each bulb, dig a hole 3 to 8 inches deep, depending on the size of the bulb. Larger bulbs should be planted deeper, while smaller bulbs can be placed closer to the surface.
- Position the Bulbs Correctly: Place the bulbs in the hole with the pointed end facing upward. If the bulb doesn’t have an obvious top, plant it on its side to ensure proper root and shoot development.
- Cover the Bulbs with Soil: Gently cover the bulbs with the soil you dug out, filling the hole completely. Pat the soil down lightly to remove air pockets but avoid compacting it too much, as the bulbs need loose soil to grow.
- Water the Bulbs: After planting, water the area thoroughly to help settle the soil around the bulbs. This initial watering helps the roots begin to establish before winter.
- Mulch the Planting Area: Apply a layer of mulch, such as straw or shredded leaves, over the planting area to insulate the bulbs during the winter months. Mulching also helps retain moisture and prevents weeds.
- Mark the Location: Use garden markers or stakes to indicate where you planted your Fritillaria bulbs. This prevents accidental digging and helps you track the bulb’s progress in the spring.
- Monitor for Frost: Keep an eye on the weather, especially if frost arrives earlier than expected. While Fritillaria bulbs can tolerate cold, an early deep frost may damage bulbs that haven’t fully established.
Replanting Fritillaria Bulbs

Fritillaria bulbs don’t need to be replanted every year, but replanting them every few years can improve their health and appearance. Knowing when and how to replant is essential to keeping them vibrant and blooming year after year.
When to Replant Fritillaria Bulbs
The best time to lift and replant Fritillaria bulbs is during the late summer or early fall, once the foliage has completely died back. This period allows the bulbs to rest after blooming and ensures that they are ready for replanting. You may need to replant if you notice overcrowding or a decline in the number of blooms, both signs that the bulbs need more space to grow.
Steps for Replanting Fritillaria Bulbs
Replanting Fritillaria bulbs is essential for maintaining their health and vibrant blooms over time. Overcrowding or a decline in flowering can signal that it’s time to replant. Follow these steps to ensure successful replanting and continued growth year after year:
- Identify the Need for Replanting: Determine if replanting is necessary by checking for overcrowding, reduced flowering, or signs of poor growth. Replant bulbs every 3 to 5 years to maintain healthy blooms.
- Carefully Dig Up the Bulbs: Use a garden fork or spade to gently lift the bulbs out of the soil. Be careful not to damage the bulbs or roots while digging them up.
- Inspect the Bulbs: Examine each bulb for signs of disease, rot, or damage. Discard any unhealthy bulbs to prevent issues in the new planting location.
- Separate the Bulbs: If the bulbs have multiplied and are crowded, gently separate them by hand. Ensure that each individual bulb has healthy roots attached.
- Prepare the New Planting Site: Choose a well-drained location with suitable light conditions (full sun or partial shade). Amend the soil with organic matter if necessary to improve drainage and nutrients.
- Replant the Bulbs: Dig new holes that are 3 to 8 inches deep, depending on the bulb size. Space them 6 to 8 inches apart to give each bulb enough room to grow.
Conclusion
Planting Fritillaria bulbs in the fall is a rewarding process that results in striking spring blooms. By preparing your soil, choosing the right location, and following proper planting techniques, you can enjoy a healthy, thriving Fritillaria display year after year. Remember, it’s important to care for Fritillaria during all seasons. Experiment with different varieties to create a dynamic garden, and don’t hesitate to explore the Fritillaria bulbs available at your online plant store for this fall’s planting season.
Frequently Asked Questions (FAQs) about Planting Fritillaria
1. When is the best time to plant Fritillaria bulbs?
The ideal time to plant Fritillaria bulbs is in the fall, typically between late September and November, before the first frost. This allows the bulbs to establish their roots over winter, ensuring strong growth and vibrant blooms in the spring.
2. What soil conditions do Fritillaria bulbs prefer?
Fritillaria bulbs thrive in well-drained soil that is neutral to slightly acidic. If your soil is heavy or clay-like, amend it with organic matter or sand to improve drainage. This helps prevent bulb rot, which can occur in overly wet or compacted soil.
3. How deep should Fritillaria bulbs be planted?
The planting depth depends on the specific Fritillaria species, but generally, bulbs should be planted 3 to 8 inches deep. Larger bulbs, like Fritillaria imperialis, require deeper planting (around 6-8 inches), while smaller species may only need to be planted 3-4 inches deep.
4. Do Fritillaria bulbs need to be replanted every year?
Fritillaria bulbs don’t need to be replanted annually but may benefit from lifting and replanting every few years, especially if they become overcrowded or blooms start to decline. This allows the bulbs to spread out and continue producing healthy flowers.
5. Can Fritillaria bulbs be ordered from your online store?
Our online store Dutch-bulbs.com offers a wide selection of Fritillaria bulbs in various colors, making it easy for you to add these elegant beauties to your garden. We source our bulbs from reputable growers to ensure you receive high-quality specimens. Simply browse our online catalog, select your preferred varieties, and follow the easy ordering process.
Published: 30.09.2024
