
It was amazing watching my workshop being built on Wednesday. It was like having a real life HGTV show happening right in my back yard, and it almost seemed to happen as fast as those unrealistic shows. The whole workshop, from beginning to end (not including the garage door installation) was built, painted, and shingled in a span of less than 27 hours. The whole structure was built and painted on the first day, and then yesterday, they returned to install the front door, shingle the roof, and strap down the anchors. The company I used contracts out the installation of garage doors, so they came later in the after yesterday.
Here’s how it looks now that it’s completely finished.

And of course, when I say it’s finished, what I mean is that their part is finished. Now it’s up to me to take this from plain to cute, and I’ll do that by adding blue shutters, a coral front door, window flower boxes, front steps, skirting, and a perimeter of gravel around the whole thing. And of course, I’ll add some potted plants by the door. But for now, I’m just happy to have the building, even as plain as it is.
I took pictures of the whole process, and even though this wasn’t a DIY project for me, it could very easily be a DIY project for some of you. The process itself is not difficult. Where the difficulty comes in is that this isn’t a one-person project. You’ll definitely need some help, and that help needs to be (1) helpers who have muscle (for at least some parts of the process), and (2) helpers who aren’t afraid of heights (for the roof). But if you can find helpers like that, this could very easily be a DIY project, although I doubt that it will be a 27-hour project. 😀
There are a few reasons these guys were able to build this so fast:
- They do this every day and have the process down so well they could probably build these in their sleep. Watching them do this was like watching a choreographed dance. Each person knew their part and didn’t miss a beat.
- When they arrived, about 99% of every piece of lumber, plywood, and everything else they needed was already cut to the exact size they needed. This is done in their shop according to the measurements of the building. Not having to cut plywood and lumber to size on site saved a ton of time.
- These buildings aren’t built like houses. On a house, walls are generally raised when they’re just at the framing stage (only 2″ x 4″ lumber). Once the framed walls are raised, then they’re covered with OSB, house wrap, and then siding, in three separate steps. But with these buildings (my workshop is just a big, glorified shed), they use a product that basically has the house wrap, OSB, and siding all in one product. So it gets applied in one step instead of three.
But even with those advantages and time-saving steps, it was still amazing to see this go from nothing to finished in such a short amount of time. And let me tell you something, these guys are hard workers!! They worked nonstop from 7:30am to 4:30pm, with only about a 30- or 45-minute lunch break. (I wasn’t here when they went to lunch, so I’m not sure exactly how long they were gone. But it couldn’t have been longer than 45 minutes.)
Anyway, let me get on with the process.
Laying out and connecting the skids
My building is 18′ x 27′, and for this size building, they used four of these big beams called skids. I didn’t measure them because I didn’t want to get in their way, but these looked to be 4″ x 6″. These went the length of the building (27′).

Because these skids don’t come in that length, they had to piece two together for each 27′ run. You can see where they have two laid out end-to-end for each one.
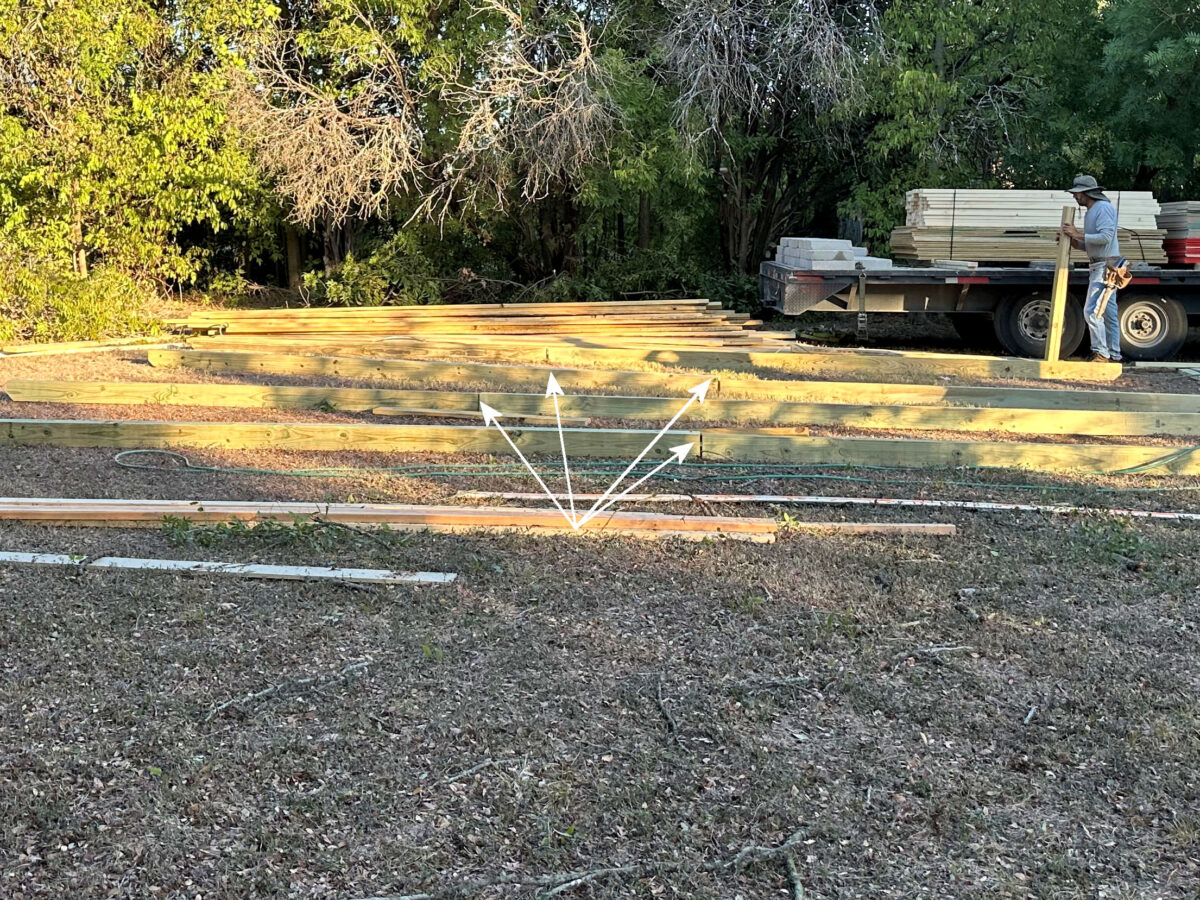
To secure those together, they used long pieces of 1″ lumber nailed to each side of the skid over the area where they connected. I didn’t get a picture of that when they did it, but you can see it here…

Building the foundation
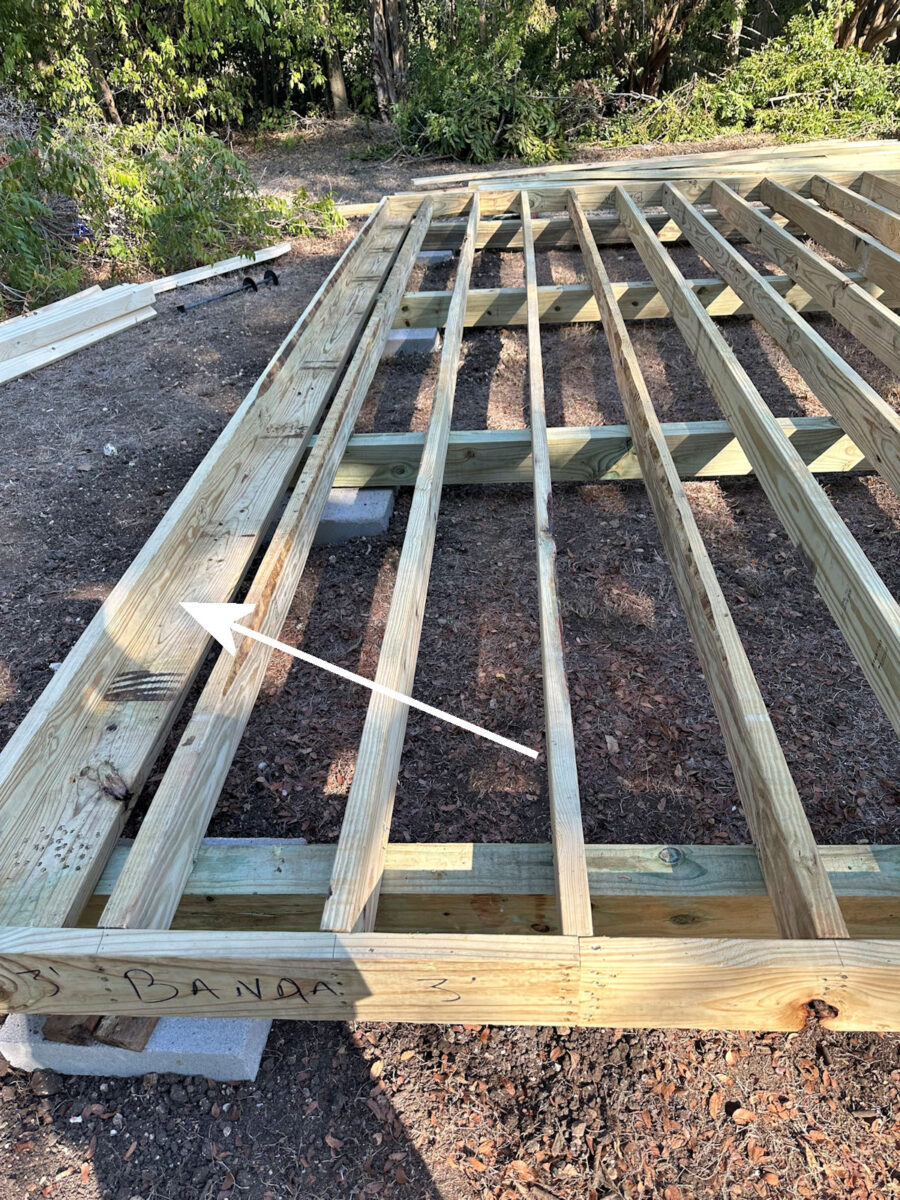
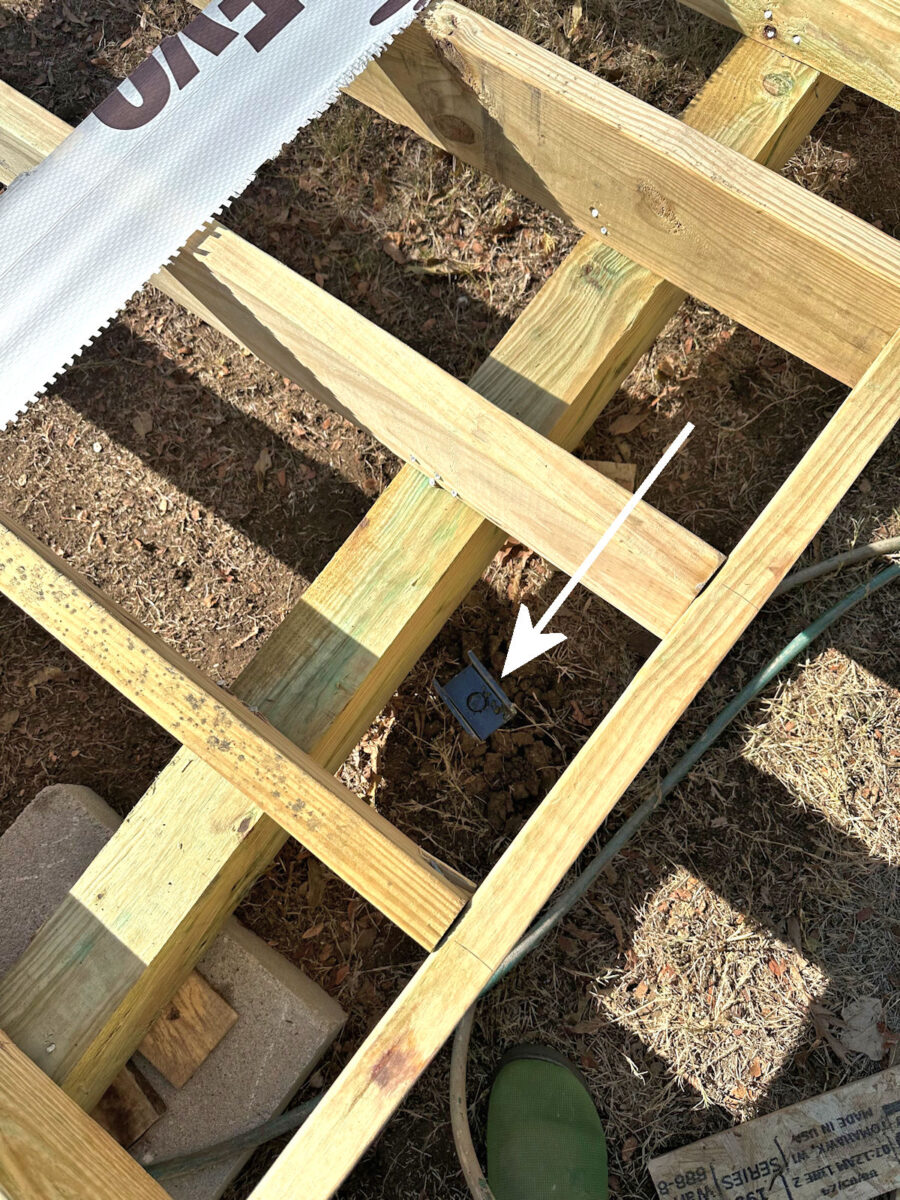
Once they had all four skids assembled, they attached these boards, which were either 2″ x 8″ or 2″ x 10″ boards, and nailed them on so that the boards were lying flat. These boards overlapped the sides of the skids by about 10-12 inches, and overlapped the ends of the skids by a few inches as well. It was nailed to the skids so that the skids were 4′ apart.

You can see that board here. They used about 20 nails through that board into each skid. I got a little behind in my picture taking and didn’t get a close up picture until the foundation was finished, but the board with the arrow is the one that was attached first.
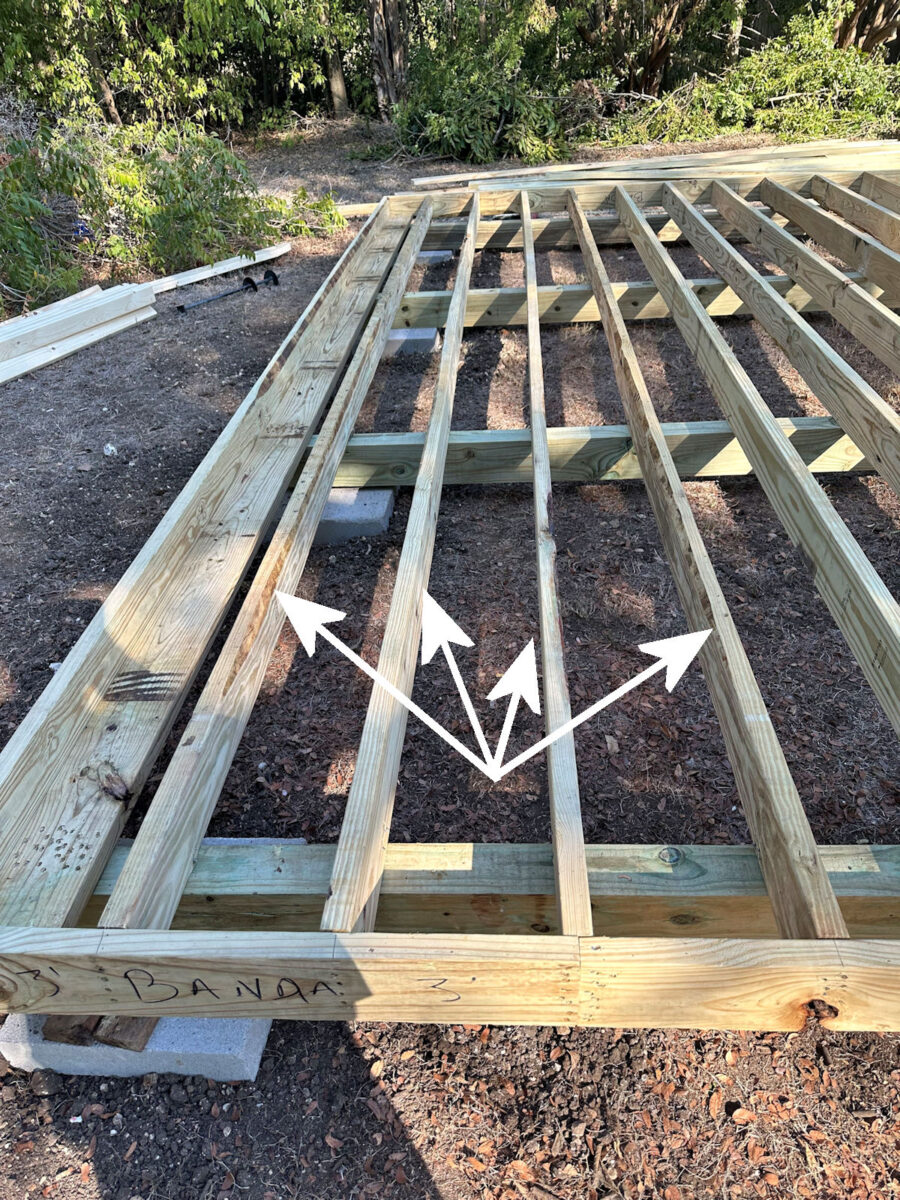
After those two boards were attached (one on each end), they used that to build a perimeter frame using 2″ x 6″ lumber standing up on end. This perimeter frame was nailed into those two previous boards.

After that perimeter frame was nailed into place, they went back and added the floor joists (also 2″ x 6″ lumber) placed 16 inches apart on center.
Like I said, I got a bit behind on my picture taking (I didn’t want to get in their way), but they actually built the entire foundation directly on the ground (i.e, the skids were directly on the dirt), and then they went back and added the concrete blocks. After the concrete blocks were added, they then leveled the foundation using a jack and shims. I didn’t get a picture of that, but it should be pretty self-explanatory.
At this point, they used this machine, which was like a very slow turning auger, to place anchors into the ground. For a building this size, the city required six anchors, three on each long side.
These are the same anchors that are used for tying down mobile homes. They’re 30 inches long and have spikes that hold them in the ground. They didn’t actually strap it down at this point because they needed to be able to make adjustments as the building was being built. But they had to get the anchors in place while these areas were still accessible.

You can see one of the anchors sticking out of the ground here…
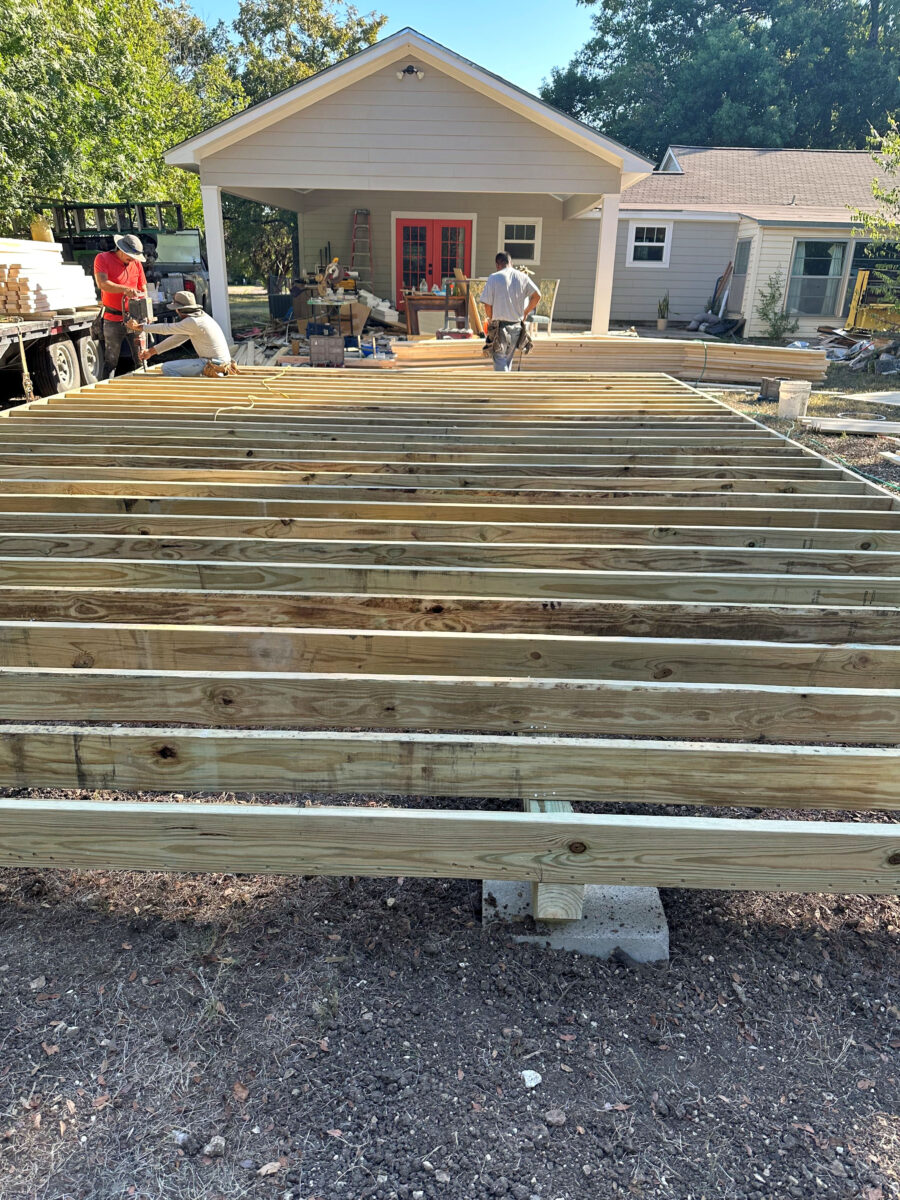
And with that, the foundation was finished. Here’s another look at one end so you can see all of the parts of the finished foundation.

And here’s a different angle…

Adding the subfloor
Next, they added these strips of plastic (it looks like Tyvek-type house wrap) every four feet where the subfloor plywood would meet. (Again, I reiterate that these buildings aren’t built like a house. But if you’re doing it yourself, I would imagine you could wrap the entire thing if you wanted to.)

And then they attached the subfloor, which is 3/4-inch plywood, and nailed that to the floor joists and perimeter frame.

Building the walls
Once the subfloor was installed, they moved on to building the walls. They started with the front wall (i.e., the wall with the front door and two windows).

Here’s a look at how a wall is constructed. It starts with a horizontal 2″ x 4″ board at the bottom. This is called the base plate or sole plate. Perpendicular to the base place are the studs. Those are spaced 16 inches on center. And then at the top is another horizontal 2″ x 4″ board. This is called the top plate. I’ve only ever seen the top plate consist of two stacked 2″ x 4″ boards, but they did one 2″ x 4″ and one 2″ x 8″ board. It all makes sense later.

In the above picture, you can also see how a window opening is framed. It starts with a load-bearing header at the top. That header is made of two 2″ x 6″ pieces with a piece of plywood sandwiched in between to make it 3.5 inches thick. And then a 2″ x 4″ piece of lumber is nailed to the top, and another one is nailed to the bottom. That entire assembly makes up one load-bearing header for a window. The same construction is used for the header above the door.
That header is held into place by two jack studs that form the sides of the window opening. Under those jack studs is the rough window sill that forms the bottom of the window opening. And that rough window will is held in place by two more jack studs underneath it, with cripple studs in between to keep the 16-inch spacing consistent.
Once the wall wall was framed, they added the all-in-one product that I mentioned earlier, which is basically an insulation/house wrap, OSB, and siding, all in one. They attached these so that the edges of this siding product lined up with the edges of the vertical studs on the ends of this wall.

These pieces were nailed onto each stud.

You can see right here that these pieces extended past the bottom of the base plate by about five inches. You can also see what I mean about these pieces coming right to the side edges of the wall studs on the ends.

While one guy finished attaching the all-in-one siding pieces, another one used a router to cut out the windows and the door.

Next, they attached this fascia board (strips of the same all-in-one product) to the front edge of the 2″ x 8″ board at the top of the wall. This strip overlapped the top of edge of that 2″ x 8″ board by about four inches. I didn’t understand this at this point, but it all made sense later.

Here’s another view of it looking down at the top of the wall. You can see that he left it extended out about 10 inches, and it sticks up about three or four inches. This will make sense later. They also measured and marked the spacing for the trusses along the top plate of the wall.

Before raising the wall, they did all of the caulking, and also installed the windows. They used flanged new build windows that I provided. Before installing the window, they put a bead of caulk around the top, the sides, and about two inches in on each side of the bottom. Then they placed the window in the opening and attached it. The caulk was between the flange and the siding.

They moved so fast that I missed getting a picture of them adding the trim around the window, but those trim pieces went right over the flange of the window and were nailed in place.
They did every bit of caulking (every nail hole, every seam, everything) before raising the wall. By the time the wall was raised, all it needed was paint.

And finally, it was time to raise the wall. Before they raised the wall, they attached two scrap pieces of lumber to the base frame to act as a stop to keep them from pushing the wall over the edge of the foundation as they raised the wall.

And there it is. The first wall (the front wall of the workshop) raised into place. At this point, they didn’t nail the wall into place. They just used bracing to keep it upright. They didn’t nail any walls to the subfloor/foundation until all of the walls were in place.

I took this picture of the edge view of the wall so that could see why they extended that OSB/siding piece past the base plate by a few inches. It’s so that it overlaps that bottom frame of the foundation to keep water out when it rains.

With that front wall up, they started on the end wall. The end shown in the picture below was pretty straightforward since it didn’t have any windows or a door. It’s just a solid wall. But this wall does include a truss for the roof, so it was a bit different from the front wall.

In the picture below, I’m looking at the wall from the top down. So the bottom (base plate) of the wall is at the far side from me. And just like the front wall, it consists of a base plate and studs spaced at 16 inches on center. But the top (in the foreground closer to me) is a bit different. The top place consists of two 2″ x 4″ pieces of lumber, and then they nailed on a 2″ x 4″ piece attached vertically. And you can see that it extends on each end about four inches. I had no idea what this was for, but it was about to make sense.

Here’s a look at this wall from the other direction. You can see that most of it is just a plain, straightforward wall structure.

So what was that top 2″ x 4″ that was attached standing up on its end used for? That’s what they nailed the end truss to!

So let me talk about the trusses for a second. This was the only part of the building that arrived pre-assembled. They had a whole stack of trusses that consisted of three boards — the two boards that form the peak of the roof, and the cross board that holds them together. But two of the trusses (one shown below) didn’t have that cross brace holding the angled boards together. And those two were the end trusses that got attached directly to the end walls.

Instead of having that cross brace holding the side pieces together, they attached vertical pieces inside these trusses. The vertical pieces were nailed to that same top 2″ x 4″ piece to which the truss was nailed, and then these pieces were nailed into the truss at the top. The top nails had to be toenailed in (shot at a diagonal through the brace and into the truss).

I didn’t get a picture of the construction before they raised the wall, but you can see a good view of it a couple of pictures down.
And just like the front wall, they did all of the construction and caulking before raising the wall. While one finished the far side wall, the other started on the side wall closer to me.

One thing I did not get a picture of, but I hope I can explain here using this picture that jumps ahead many steps (try to ignore that confusing fact) is that before they raised the side walls, they attached a strip of the roof material (plain OSB) to the top edge of the truss, attaching it so that it was nailed down the center of the edge of the board, and so that it stick out several inches. You can see that OSB strip here…

And then to the edge of that strips that stuck out a few inches, they nailed these fascia boards. And again, this wall all done before the walls were raised, and everything was caulked and pretty much finished, except for paint, when the walls were raised.

I also want to point out that this wall with the big garage door opening was done exactly like the other walls in that it had a base plate that went the full length of the wall. That base plate was there until all four walls were raised and put into place. Only then did they come back and use a reciprocating saw to cut out that base plate. But that plate needed to be there to add stability while they raised and moved the wall into place.

Here’s a view with both end walls up. You can now get a good view of those vertical pieces they attached inside the truss. They raised these walls, scooted them over so that they snugged up against the front wall, and then nailed the walls together from the outside of the building, nailing the end studs together all up and down the corner.

Once the walls were nailed together, they added these vertical trim pieces on the corners.

They also added these additional temporary braces holding the front wall to the side walls.

At this point, they used a reciprocating saw to cut away the excess fascia board from the front wall so that the two boards met at the corner, and then they caulked these boards where they met.

Here’s a view from the front at this stage with the three walls.

I didn’t take pictures of the back wall because it was built and raised exactly like the front wall. Once it was raised, they nailed it to the side walls and added the outside vertical corner trim.
Building the roof
With the fourth wall raised, and because they had done the caulking before raising the walls, one guy started painting the building while the other two started working on the roof. I was fascinated to watch them do this. They hung all of the trusses upside down from the front and back walls.

And then one climbed up on top of the front wall, and the other climbed up on top of the back wall, and one by one, working from my right to my left, they raised a truss rightside up, placed it on the marks they had pre-marked before raising the walls, and nailed the trusses into place. And this is where you can see the genius in pre-attaching that fascia board, and why it extends up a few inches. It extends up the perfect measurement so that it covers the ends of the trusses plus allows for the thickness of the roof OSB. But it’s incredibly helpful during this step just to stabilize the trusses and make it easier for them to get them placed and nailed.

Once all of the trusses were nailed into place, the other guy had finished painting the building and started working on painting the trim while the other two starting attaching the OSB to the trusses. Again, these pieces were all pre-cut in their shop before they even got here, so it went pretty quickly.

And here it is! An entire 18′ x 27′ workshop built in a day!

The next day, they installed the door, shingled the roof, and strapped the building to the anchors. I didn’t get pictures of any of that process because those are very common things that most DIYers know how to do. (Except for strapping down a building, and I just didn’t want to get in his way. I’m sure there’s a YouTube video showing that process.) But by watching this building process from beginning to end, I definitely learned a few things that I didn’t previously know, even with all of my years of DIYing. I actually feel like I could build a little shed myself now! (With helpers with muscle and no fear of heights, of course!)
I’m so excited to finally have my own workshop. It still has a long way to go before it’s actually usable, efficiently organized, and cute on the outside. But this is a great start!
So how much did this cost? The total for this building came to $21,472.66. That comes to $44.18 per square foot, which seems about right for an unfinished building that doesn’t have electrical, plumbing, and has an unfinished interior. It’s up to me to finish the rest.

Addicted 2 Decorating is where I share my DIY and decorating journey as I remodel and decorate the 1948 fixer upper that my husband, Matt, and I bought in 2013. Matt has M.S. and is unable to do physical work, so I do the majority of the work on the house by myself. You can learn more about me here.